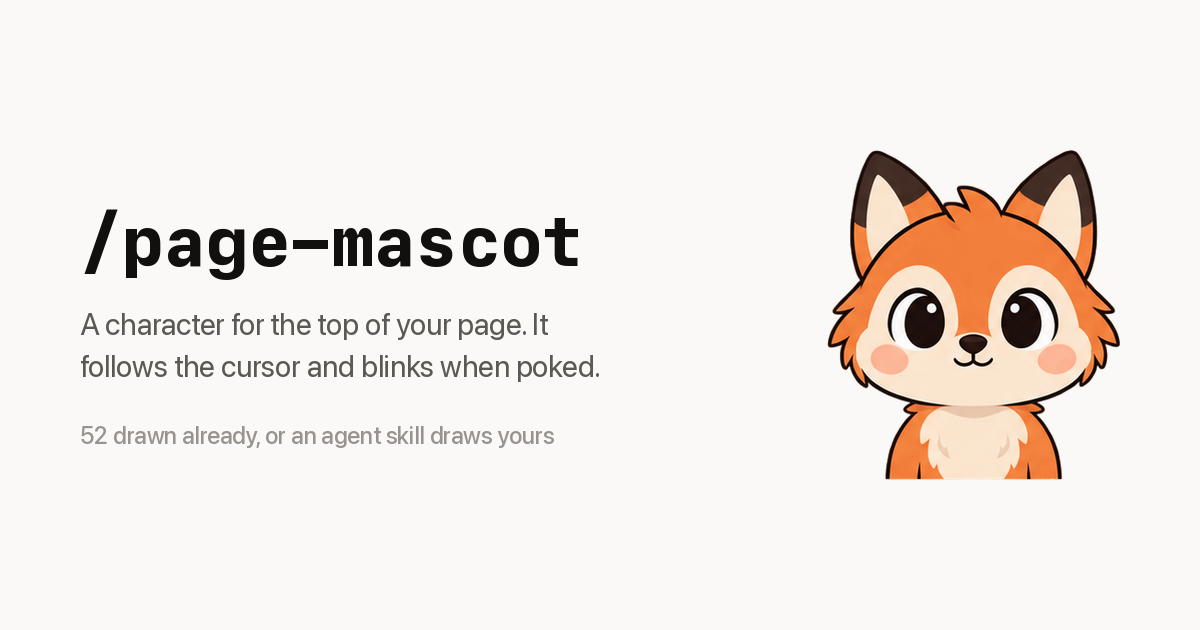

page-mascot offers a solution for injecting simple, interactive elements into web pages without adding significant technical overhead, performance penalties, or a steep learning curve. The need is for lightweight, self-contained components that improve user experience.
page-mascot, an open-source project from nilbuild, is a solution to this. With 118 stars on GitHub, nilbuild/page-mascot shows that developers value its focused approach to creating a simple, interactive mascot. This article will provide information for developers about page-mascot's design, its technical structure, integration methods, and ways to contribute. This will give you a full understanding of how page-mascot operates and how to use or extend it in your web projects.
The Design: Why It Was Made
page-mascot meets the need for a lightweight, client-side visual companion. Its design prioritizes simplicity and easy integration, providing a single, focused piece of interactive web content with minimal dependencies and maximum embedding flexibility.
The maintainers chose not to create a full web application or complex interactive framework. page-mascot is not a component library or a highly customizable platform for diverse animation types. It has one purpose: to provide a cursor-following, blinking, and "pokeable" mascot. This narrow scope makes the project very lean. Making it a generic animation engine would add bloat, requiring complex configurations, broader browser compatibility testing across various animations, and potentially a heavier JavaScript footprint. By focusing on a specific kind of animation, page-mascot works well for its niche.
This design introduces trade-offs. The main trade-off is between extensibility for arbitrary animations and simplicity. For developers who need a simple mascot, the project's opinionated defaults and codebase are useful. It requires no heavy build tools, no complex module systems, and no server-side logic beyond serving static files. Its flexibility comes from low coupling: it is a collection of static assets (HTML, CSS, JavaScript, images) that integrate into almost any web project.
page-mascot has near-zero overhead compared to more animation-focused JavaScript libraries or web component frameworks. Libraries like GreenSock (GSAP) or Three.js have more powerful animation capabilities but come with larger bundle sizes and steeper learning curves. page-mascot does not compete on feature breadth; it competes on developer experience for a specific outcome: "I want a simple character on my page that reacts to the mouse." There is no complex API to learn, just a few constants to adjust in one JavaScript file.
The project's opinionated defaults show in its default mascot design (a simple, two-frame animation character) and its pre-configured behaviors like blink frequency and follow speed. These defaults provide a functional, aesthetically pleasing experience out of the box, reducing the initial cognitive load for developers. A developer can clone the repository, run a single Python script, and immediately see a working mascot. This "batteries included, but easily swappable" approach ensures a quick start while still offering straightforward ways for visual customization and behavioral fine-tuning.
A Practical Use-Case Walkthrough
Consider a developer maintaining a personal portfolio website or a small, static marketing page built with plain HTML, CSS, and JavaScript, perhaps served through a simple CDN or a lightweight static server. They want to add a subtle element to their site to make it feel more dynamic and personable, but without introducing a React or Vue component, a new dependency, or a complex build step. This is a perfect scenario for page-mascot.
Starting State: The developer has an existing index.html file, a styles.css, and perhaps a main.js for existing site logic. They have a basic static server setup or are just serving files directly.
Step-by-Step Integration:
-
Obtain the Mascot Assets: The first step is to get
page-mascot's core files. The most straightforward approach is to clone the repository and then extract the necessary assets.# Clone the repository git clone https://github.com/nilbuild/page-mascot.git cd page-mascot # Run the local server to preview the mascot # This serves the mascot from http://localhost:8000 (or custom port) python mascot.py --port 8080 ``` After running `python mascot.py --port 8080`, the developer would visit `http://localhost:8080` in their browser to see the mascot in action. This allows them to preview its default behavior before integration. 2. **Identify Core Assets:** From the cloned repository, the developer notes that the essential files are located within the `mascot/` directory: * `mascot/body.png` * `mascot/eyes.png` * `mascot/eyes_blink.png` * `mascot/mascot.css` * `mascot/mascot.js` 3. **Integrate into Existing Project:** The developer would then copy these `mascot/` files into a suitable location within their existing web project (e.g., `my-portfolio/assets/mascot/` or `my-portfolio/js/mascot/`). 4. **Reference Assets in `index.html`:** Next, they open their project's main `index.html` file and add the necessary `` and `` tags. It is important to place the JavaScript tag just before the closing `</body>` tag to ensure the DOM is fully loaded when the script executes. The CSS can be placed in the `<head>`. ```html <!DOCTYPE html> <html lang="en"> <head> <meta charset="UTF-8"> <meta name="viewport" content="width=device-width, initial-scale=1.0"> <title>My Portfolio</title> <link rel="stylesheet" href="/styles.css"> <!-- Include mascot CSS --> <link rel="stylesheet" href="/assets/mascot/mascot.css"> </head> <body> <header> <h1>Welcome to My Portfolio</h1> </header> <main> Check out my projects! </main> <footer> © 2023 My Portfolio </footer> <!-- Include mascot JS right before </body> --> <script src="/assets/mascot/mascot.js">- Result: With these additions, the developer's portfolio page now has a mascot that follows the cursor, blinks periodically, and reacts with an eye animation when "poked" (clicked). The entire integration requires no changes to build scripts, no package manager installations for the frontend, and minimal HTML edits, following the project's design of unobtrusive enhancement.
Under the Hood: The Actual Tech Stack
page-mascot's technical architecture shows the power of simplicity and the effective use of core web technologies combined with a minimal server component. The project's verifiable stack is primarily composed of standard web technologies for the client-side experience and a lean Python script for local development serving.Pure JavaScript powers the primary interaction, complemented by HTML for structure and CSS for presentation and positioning. There is no client-side framework (like React, Vue, Angular) involved, nor any complex transpilation or bundling. This choice reinforces its lightweight nature, ensuring broad browser compatibility and minimal payload size. The Python script (
mascot.py) functions only as a local HTTP server, using Python's standard libraryhttp.servermodule to serve the static web assets. It is a pragmatic choice for quickly spinning up a preview environment during development, not a core runtime for the mascot's client-side behavior.The project's data and content are structured internally in a straightforward, hierarchical manner. All assets related to the mascot reside within a dedicated
mascot/directory. This convention keeps the project organized and makes it easy for developers to identify and extract the necessary files for integration into their own projects.page-mascot/ ├── mascot.py # Python script for local development server ├── index.html # Example HTML page using the mascot └── mascot/ # Directory containing all mascot assets ├── body.png # Main body image of the mascot ├── eyes.png # Default eyes image ├── eyes_blink.png # Eyes image for the blinking animation ├── mascot.css # Stylesheet for mascot positioning and sizing └── mascot.js # Core JavaScript logic for interactionWithin
mascot.js, the project stores its configurable parameters directly as JavaScript constants. This includes values for animation speeds, blink durations, and interaction thresholds. This direct-in-code configuration aligns with the project's minimalist approach; external configuration files (like JSON or YAML) are unnecessary given the simplicity and scope of the parameters.page-mascothas no conventional build and deployment process. There are no build steps, no minification processes, no module bundlers like Webpack or Rollup, and no transpilers like Babel. The assets are deployed "as is." For production use, a developer simply copies the contents of themascot/directory (and optionallyindex.htmlas a template) into their web server's static asset directory. The Pythonmascot.pyscript is a development utility; it is not for production serving. This "no-build" paradigm simplifies integration, makingpage-mascotaccessible to projects ranging from simple static sites to those with complex, existing build systems where adding another toolchain would be undesirable.Building or Extending It: A Practical Guide
Running
page-mascotlocally is simple, reflecting its lightweight design. Extending or customizing it for your needs also follows a direct path, primarily involving modifications to its JavaScript and image assets.Getting Started Locally:
- Clone the repository: Obtain the source code from GitHub.
git clone https://github.com/nilbuild/page-mascot.git cd page-mascot- Run the local server: The
mascot.pyscript serves theindex.htmland all related assets. Python 3 is the only dependency.
python mascot.py
# Optionally specify a port:
# python mascot.py --port 8000
Once the script runs, open your web browser and navigate to `http://localhost:8000` (or your chosen port) to see the mascot live.Customizing the Mascot:
The primary way to customize
page-mascotis by editing themascot/mascot.jsfile and replacing the image assets.Let's say you want to change the mascot's following speed and how frequently it blinks. Open
mascot/mascot.js:// mascot/mascot.js snippet (annotated for customization) // These constants control the mascot's behavior const FOLLOW_SPEED = 0.1; // How quickly the mascot catches up to the cursor (0 to 1, higher is faster) const BLINK_DURATION = 150; // How long the blink animation lasts, in milliseconds const BLINK_INTERVAL = 3000; // How often the mascot blinks naturally, in milliseconds // ... (rest of the mascot logic) function initMascot() { // ... setup and event listeners } document.addEventListener('DOMContentLoaded', initMascot);To make the mascot follow the cursor more slowly and blink less often, you would adjust
FOLLOW_SPEEDto a lower value andBLINK_INTERVALto a higher value:// Customized mascot/mascot.js snippet const FOLLOW_SPEED = 0.05; // Slower follow speed const BLINK_DURATION = 200; const BLINK_INTERVAL = 5000; // Blinks every 5 seconds instead of 3Beyond behavioral changes, the visual design is controlled by the
body.png,eyes.png, andeyes_blink.pngfiles within themascot/directory. To give your mascot a new look, simply replace these images with your own custom artwork, ensuring they maintain the same filenames and relative sizes for seamless animation. You might also need to adjustmascot.cssto properly position and size your new images if their dimensions differ significantly from the defaults.One Gotcha: Browser Caching and Local Server Reloads
Browser caching is a common issue when customizing
page-mascot(or any static asset-heavy project). If you modifymascot.jsor replace the image files and then refresh your browser, you might not immediately see the changes. Your browser may be serving the old files from its cache. To ensure you see your modifications:- Perform a "hard refresh" or "empty cache and hard reload" in your browser's developer tools.
- If you are using the
mascot.pyserver and modify the Python script itself (though less likely for mascot customization), you will need to stop the server (Ctrl+C) and restart it to pick up changes tomascot.py. For changes tomascot.js,mascot.css, or images, a hard refresh in the browser is usually sufficient. - When integrating into a more complex existing project, remember that your project's build process or CDN caching might also need to be cleared or re-triggered for changes to propagate.
Contributing to the Project: The Open-Source PR Process
Contributing to
page-mascotis a straightforward process, aligning with typical open-source practices. As a project focused on simplicity, contributions are generally welcomed if they maintain the core design and improve the user experience without adding unnecessary complexity.Step 0: When to Open an Issue vs. Go Straight to a PR
- Open an Issue first: If you are considering a significant new feature (e.g., adding a new type of interaction, supporting multiple mascots), proposing a refactor, or if you have found a complex bug. An issue allows for discussion and consensus before you invest time in coding, ensuring your contribution aligns with the project's vision.
- Go straight to a PR: For minor improvements, typo fixes in comments or documentation, small bug fixes with clear solutions, or simple performance optimizations that do not alter core behavior.
Step 1: Fork, Clone, Install
The standard GitHub workflow applies.
# 1. Fork the nilbuild/page-mascot repository on GitHub to your account.
# 2. Clone your forked repository:
git clone https://github.com/YOUR_GITHUB_USERNAME/page-mascot.git
cd page-mascot

# 3. Set up the upstream remote to sync with the original repository:
git remote add upstream https://github.com/nilbuild/page-mascot.git

# 4. Install dependencies (for this project, it's just Python 3, which is likely already installed):
# No specific 'pip install -r requirements.txt' is needed for the core project as it uses standard library.
# To run the development server:
python mascot.py
Step 2: Locate the Correct File and Follow Conventions
Most changes will focus on:
mascot/mascot.js: For core behavior, interaction logic, and configurable constants.mascot/mascot.css: For styling, positioning, and visual adjustments.- Image files in
mascot/: For visual assets. index.html: For examples or documentation of integration.
When making changes, adhere to the existing code style: simple, readable JavaScript and CSS. Avoid introducing new libraries or complex language features that might complicate the codebase or increase its footprint.
Step 3: Quality Bar for Contributions
Maintainers will generally accept contributions that:
- Preserve Simplicity: Avoid adding external npm dependencies or complex build steps.
- Improve Core Functionality: Fix bugs, improve cursor following accuracy, or refine blink animations.
- Maintain Performance: Ensure changes do not introduce lag or significant resource consumption.
- Are Well-Tested: Although there is not a formal test suite, manually verify your changes across different browsers if applicable.
- Are Visual-First: For a mascot, visual correctness and smooth animation are important.
Contributions that introduce new features that deviate from the "simple page mascot" concept or add unnecessary complexity are likely to be rejected or require substantial discussion and refactoring.
Step 4: Open a Pull Request
- Commit your changes: Write clear, concise commit messages.
git add . git commit -m "feat: Add smoother cursor following logic"- Push to your fork:
git push origin your-feature-branch -
Create a Pull Request: Go to your forked repository on GitHub and click "Compare & pull request."
PR Title and Description:
- Title Convention: Use a clear, descriptive title following a conventional commit style if possible (e.g.,
feat:,fix:,docs:) such as "fix: Improve blink animation timing" or "feat: Add option for custom mascot size." - Description Checklist:
- What problem does this PR solve? (e.g., "The mascot sometimes blinks too quickly, making it look jerky.")
- How does this PR solve it? (e.g., "Adjusted
BLINK_DURATIONandBLINK_INTERVALconstants inmascot.jsand added a linear easing function to the opacity transition.") - Any visual changes? (Provide screenshots or GIFs if applicable.)
- How can the maintainer test this? (e.g., "Clone the branch, run
python mascot.py, and observe the mascot for smoother blinks.") - Any known limitations or side effects?
Post-Merge: Once your PR is merged, your changes become part of the page-mascot project, helping its ongoing evolution and benefiting other developers who use it.
Concluding Thoughts
page-mascot shows that web development does not always require complex frameworks or build systems. Its success comes from its single focus and commitment to lightweight, client-side interactivity.
Here are three takeaways for developers considering page-mascot:
- Use Minimalist Interactivity:
page-mascotis an example of how a few lines of JavaScript and simple image assets can create a user experience without heavy dependencies or complex toolchains. It is a reminder to consider simple solutions for focused UI challenges. - Easy Integration: The project's "no-build" approach and self-contained asset structure make it easy to drop into almost any web project, from basic static sites to more complex applications, without disrupting established workflows. This low barrier to entry is a significant advantage for quick enhancements.
- Client-Side Control: The core mascot logic is entirely client-side JavaScript, meaning developers have full control over customization directly in the browser's context. This allows for rapid iteration and personalization without needing server-side redeployments for behavioral tweaks.
For developers seeking to add a touch of charm and unobtrusive interactivity to their web projects, page-mascot is a practical solution. We encourage you to explore its codebase, experiment with its features, and contribute to its ongoing development. Discover page-mascot on Fossy.dev at https://fossy.dev/nilbuild/page-mascot.